Instructions
1

This pick and place project is recommended for advanced users. The assembly requires understanding mechanical principles, connecting computer components and installing the operating system, solding connections, connecting pneumatic equipment and working with mains voltage (120/240v). If you have any reservations on your abilities to complete this project, take a look at the assembly videos, which will give you a good idea on the difficulty level of this project. Full redFrog Playlist on Youtube (For assembling the redFrog Pick and Place Machine)
2

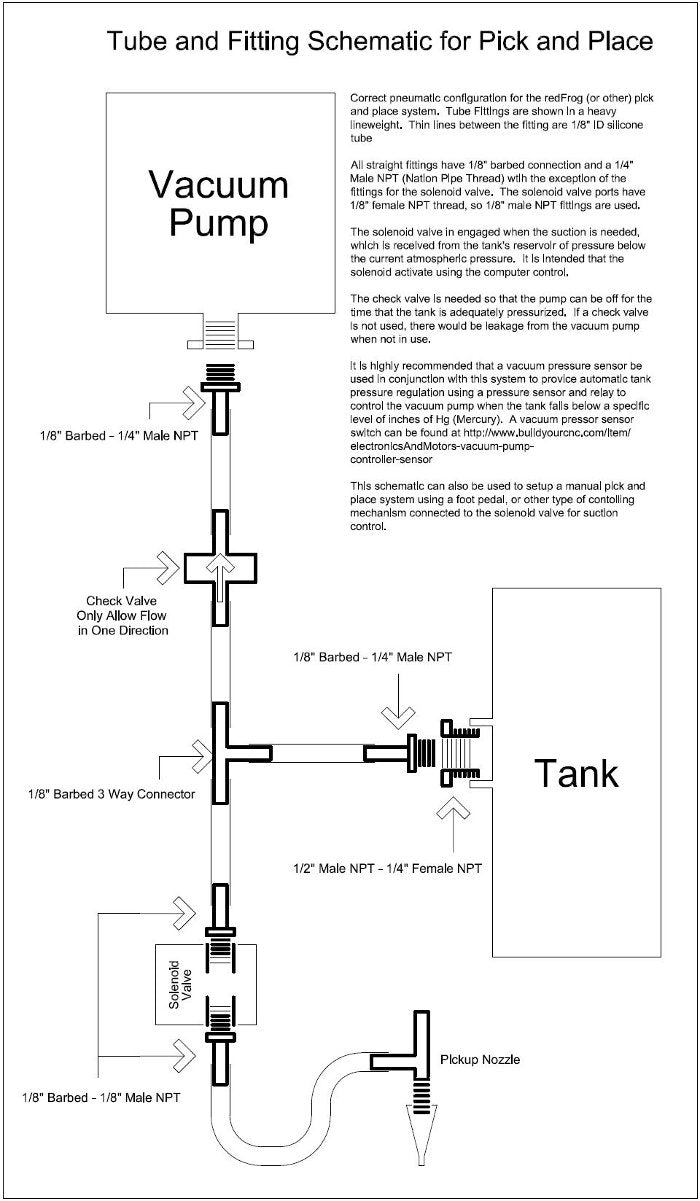
Correct pneumatic configuration for the redFrog (or other) pick and place system. Tube Fittings are shown in a heavy line weight. Thin lines between the fitting are 1/8" ID silicone tube All straight fittings have 1/8" barbed connection and a 1/4" Male NPT (Nation Pipe Thread) with the exception of the fittings for the solenoid valve. The solenoid valve ports have 1/8" female NPT thread, so 1/8" male NPT fittings are used. The solenoid valve in engaged when the suction is needed, which is received from the tank's reservoir of pressure below the current atmospheric pressure. It is intended that the solenoid activate using the computer control. The check valve is needed so that the pump can be off for the time that the tank is adequately pressurized. If a check valve is not used, there would be leakage from the vacuum pump when not in use. It is highly recommended that a vacuum pressure sensor be used in conjunction with this system to provide automatic tank pressure regulation using a pressure sensor and relay to control the vacuum pump when the tank falls below a specific level of inches of Hg (Mercury). A vacuum pressure sensor switch can be found at http://www.buildyourcnc.com/item/ electronicsAndMotors-vacuum-pump- controller-sensor This schematic can also be used to setup a manual pick and place system using a foot pedal, or other type of controlling mechanism connected to the solenoid valve for suction control.


