BuildYourCNC
Modular E-Stop (Emergency Stop) Button
Modular E-Stop (Emergency Stop) Button
Regular price
$11.95 USD
Regular price
Sale price
$11.95 USD
Unit price
per
Couldn't load pickup availability
If your CNC Machine starts to run wild, or decides to destroy itself, this button could save your machine, and your nerves! This button is capable of NC (Normally Closed - red side) and NO (Normally Open - green side) operation (notice the red and green on the bottom of the button). Push the button in to engage, and twist to release. This is an E-Stop, or Emergency stop, switch which can be completely disassembled for ease of installation on almost any control box for a CNC machine or industrial equipment. The way this works is you can engage it by depressing the mushroom cap (button) and you can release it by turning it in the direction specified by the arrows on the top of the mushroom button cap. The mushroom button can be completely removed by turning it the opposite direction of the arrows. 

 The portion of the emergency switch that is installed on the wall of the CNC control box can be removed by pushing in the flat white piece on the side. Once pushed, you can pull out the threaded section that contains the washer and nut. The dimension of the wall of the control box has to be a maximum of 0.22 inches. The nut that is tightened down to the wall of the CNC machines control box case wall.
 You can see there's grooves along the cylindrical bottom portion of this piece that aligns it correctly to this section to install it on the case. All you're going to do is remove this nut and washer and create a hole that is slightly larger than the dimension of the threads which is 0.86 in or 22 mm. You can remove this lower portion if you want by prying the plastic yellow tab and removing the lower section.
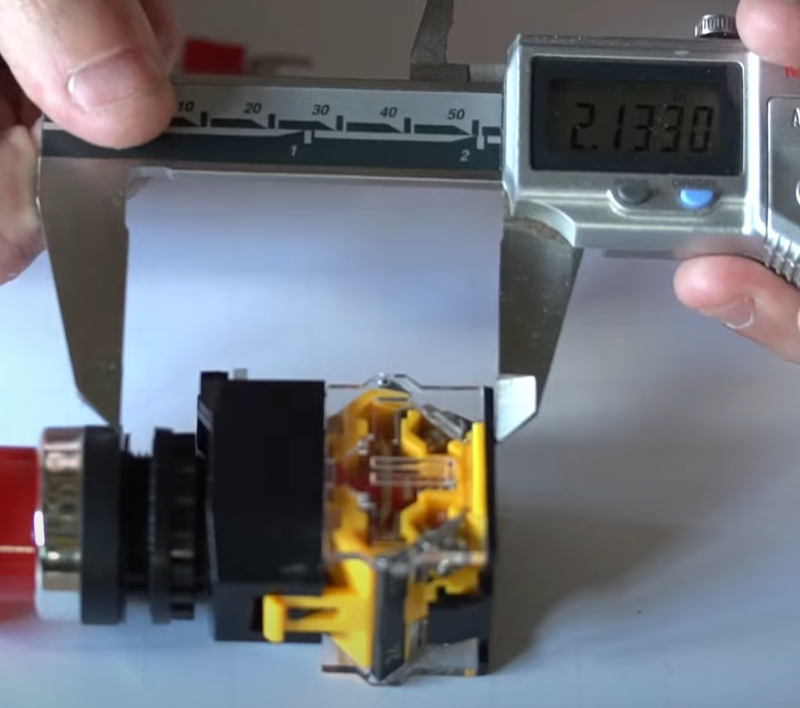
  The terminals on the bottom use standard spade or ring terminal connectors or you can just put the wire directly in underneath the plate that is underneath the screw. The dimension of the part of this E-stop that will protrude inside of the case is approximately 2.13 inches or 54 mm. The width of the section that's inside of the case is 41 mm or 1.62 inches. The depth dimension it 1.18 inches or 30 mm. The portion that will stick out of the case is 28 mm or 1.1 inches in its non-engaged state, which is the longest case condition. Video to connect an E-Stop to the pokeys57CNC controller: For Mach4 For Mach3 Video to connect limit switches to the Mach3 USB controller (same wiring for e-stops):
The portion of the emergency switch that is installed on the wall of the CNC control box can be removed by pushing in the flat white piece on the side. Once pushed, you can pull out the threaded section that contains the washer and nut. The dimension of the wall of the control box has to be a maximum of 0.22 inches. The nut that is tightened down to the wall of the CNC machines control box case wall. You can see there's grooves along the cylindrical bottom portion of this piece that aligns it correctly to this section to install it on the case. All you're going to do is remove this nut and washer and create a hole that is slightly larger than the dimension of the threads which is 0.86 in or 22 mm. You can remove this lower portion if you want by prying the plastic yellow tab and removing the lower section. The terminals on the bottom use standard spade or ring terminal connectors or you can just put the wire directly in underneath the plate that is underneath the screw. The dimension of the part of this E-stop that will protrude inside of the case is approximately 2.13 inches or 54 mm. The width of the section that's inside of the case is 41 mm or 1.62 inches. The depth dimension it 1.18 inches or 30 mm. The portion that will stick out of the case is 28 mm or 1.1 inches in its non-engaged state, which is the longest case condition. Video to connect an E-Stop to the pokeys57CNC controller: For Mach4