Skip to product information
1 of 140

BuildYourCNC

4' x 8' Vertical Laser XL - Laser Cutter/Engraver

4' x 8' Vertical Laser XL - Laser Cutter/Engraver

Regular price $8,899.00 USD
Regular price Sale price $8,899.00 USD
Sale Sold out
Title
The revolutionary Vertical Laser XL is our largest laser engraver. The lasing area is 4' x 8' (approximately 1200mm x 2400mm). The machine features an 80W CO2 laser tube and power supply to provide faster laser cutting ability.
Video: Introduction To The Vertical Laser XL

Shipping for this machine is by freight and is NOT included in the price of the machine. The shipping cost will be provided at the time of shipping. Both the kit and the assembled machine will come as a crate. The laser tube is drop shipped from another supplier and will need to be installed into the machine by the end user.

The images and videos are of an older version of this machine. The newer version uses higher quality linear rails (20mm guide rails and bearing blocks) on both axes. The price to reflect this change will be changed in July of 2021. If I have quoted you this price, or we are in communication during this price change, I will honor the previous lower price. (6/8/2021)

The Vertical Laser XL is a serious laser machine that pulls no punches. Start with a ridiculous 4’ x 8’ cutting area (hence the XL). Throw in a massive 80W CO2 laser tube. Equip with a laser control unit system. Then flip it upright because gravity be damned. You need space.

Technical Details

The price options that have no laser tube does not include the laser tube, laser tube power supply or chiller.

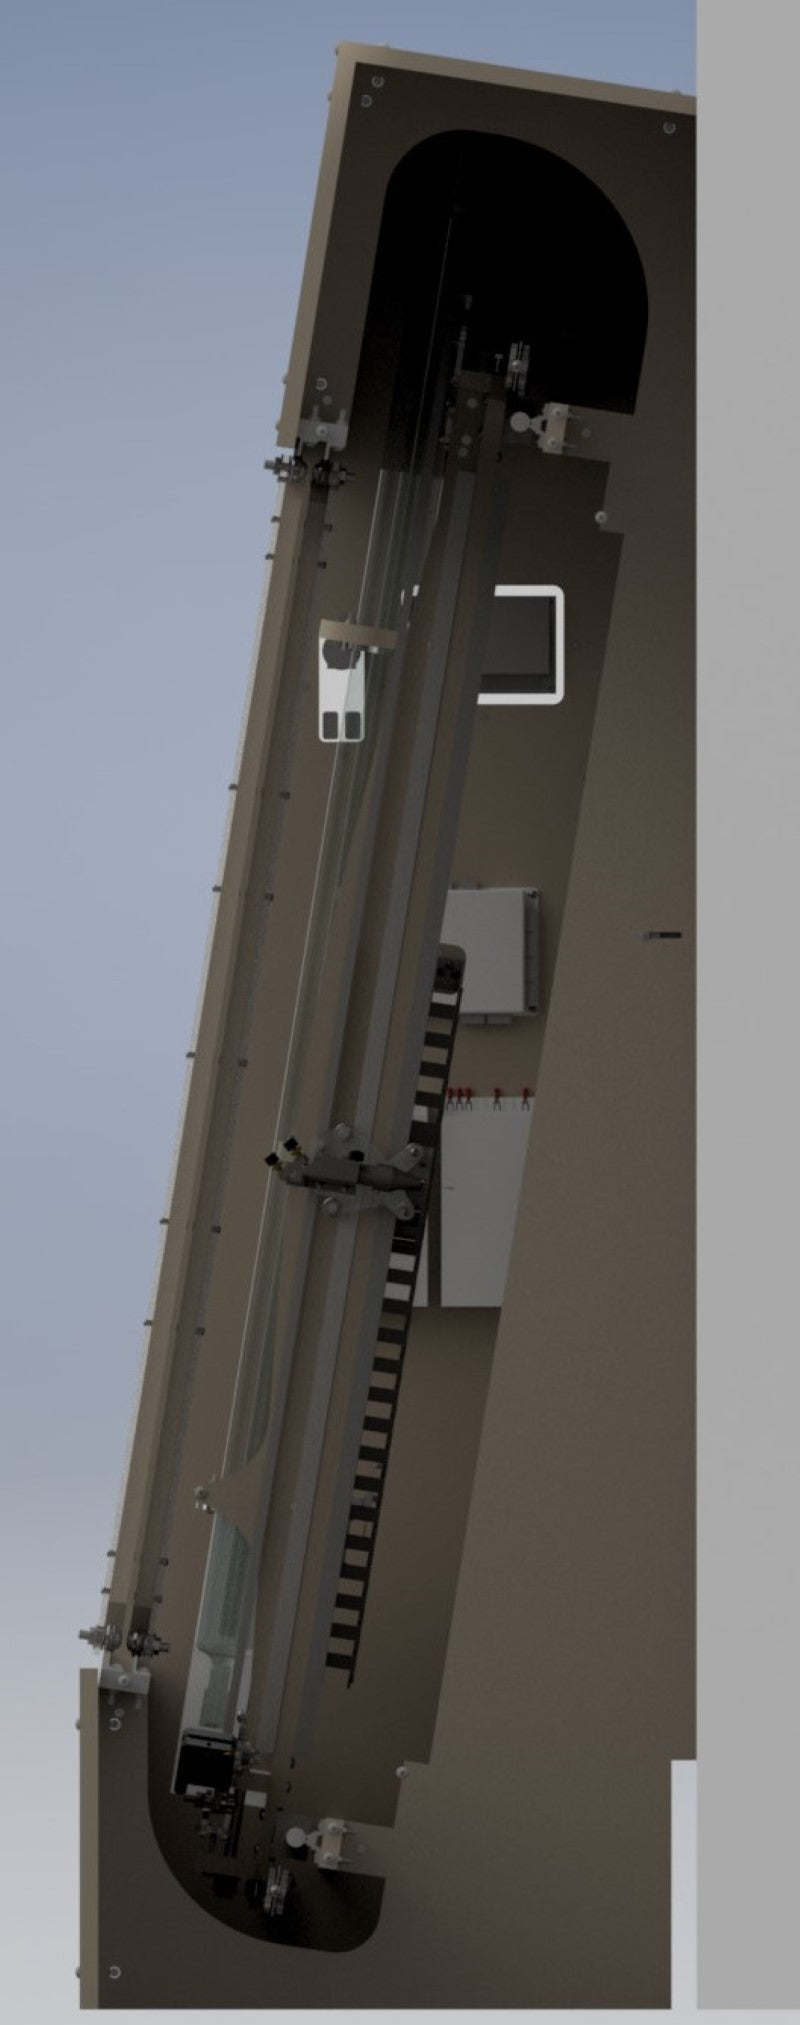
The vertical orientation of this machine provides a few advantages over a horizontal machine. It provides a large format work area with a much smaller overall footprint. The vertical orientation also helps contain toxic gases better, and reduces sagging issues with the gantry.

The VLXL is equipped with an 80W C02 laser tube and 80W power supply to provide fast lasing speed, and the option to upgrade to a 100W or 130W tube will be available in the near future.

The VLXL features an integrated control unit, allowing you to import designs from standard programs like AutoCAD, Adobe, and CorelDraw.

This machine kit has everything you need to be fully functional, including an industrial water chiller to keep the tube system cooled.

What Comes With the Kit?

  • Structure - All wood and plexi pieces for structural assembly
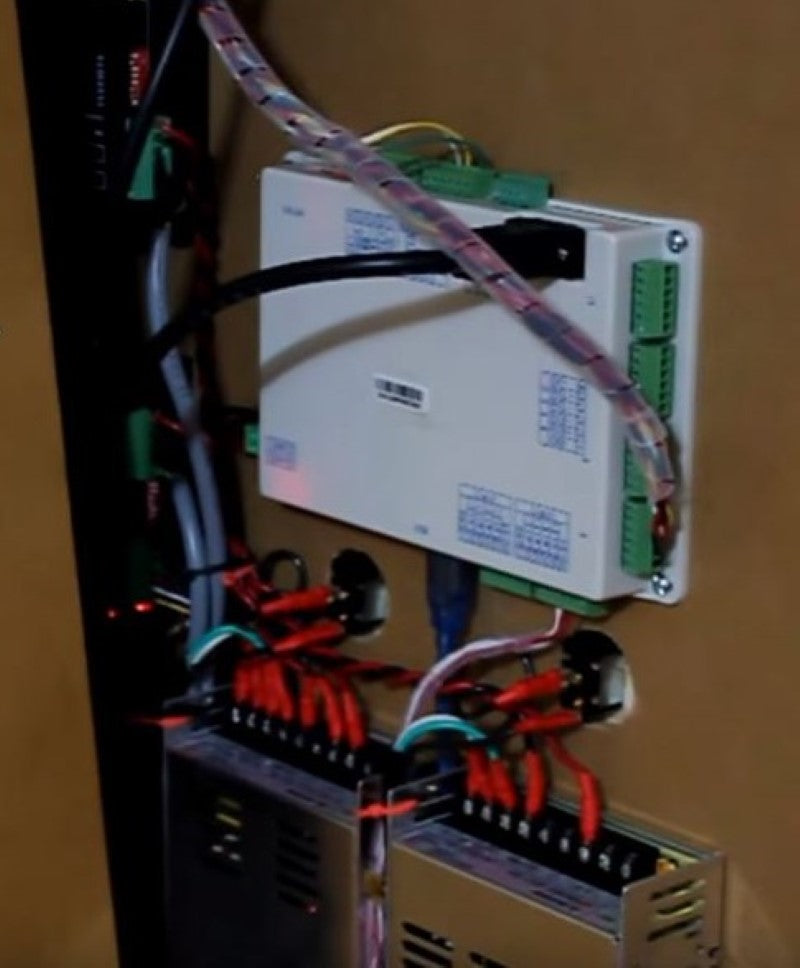
  • Electronics - NEMA 34 651 oz-in stepper motor, NEMA 24 425 oz-in stepper motor, 6 amp and 3 amp drivers for stepper motors. 36V power supply, 24V power supply. Laser Controller Interface (Controller and LCD Panel)
  • Laser Components - 80W CO2 Laser Tube, 80W Power Supply, 50.8mm laser focal lens, 25mm mirrors and mount
  • Hardware
  • Mechanical Components
  • Industrial Water Chiller

How Long Does it Take to Receive the Kit?

Please contact us to determine current queue times. Machines are shipped first come first serve. The machine typically takes us between 10-20 business days to fabricate and assemble. Shipping time will be determined by the time to fabricate, assemble (if needed) which happens after previous machines have been processed.

View full details

Instructions

1
Step 1
Example cutting plexiglass
2
Step 2
Laser Alignment Part 1
3
Step 3
Laser Alignment Part 2
4
Step 4
Laser Alignment Part 3
5
Step 5
Attach the plexi assembly using 4 - 1/4" x 1" screws and 4 cross dowels.
6
Step 6
Continue following the instructions from Step 1.
7
Step 7
Attach the bearing block using 4 M6 x 16mm bolts and 4 1/4" washers.
8
Step 8
Attach the bearing block using 4 M6 x 16mm bolts and 4 1/4" washers.
9
Step 9
Attach the bearing block using 4 M6 x 16mm bolts and 4 1/4" washers.
10
Step 10
Attach the mount using 2 1/4" x 1" screws and 2 cross dowels.
11
Step 11
Continue attaching the mount with 2 1/4" x 1-1/2" screws and 2 cross dowels.
12
Step 12
Attach to the mount using 4 #8 x 1-1/2" screws. Use 4 #8 washers in the front. Use 4 1/4" washers and 4 #8 nuts in the back.
13
Step 13
Attach the pictured assembly using 2 1/4" x 1-1/2" screws and 2 cross dowels.
14
Step 14
Continue attaching the part using 1 1/4" x 1-1/2" screw and 1 cross dowel.
15
Step 15
Continue attaching the mount using a 1/4" x 1" screw and a cross dowel.
16
Step 16
Continue attaching the mount using 2 1/4" x 1-1/2" screws and 2 cross dowels.
17
Step 17
Secure the motor to the mount using 4 1/4" x 1-1/2" screws and 4 1/4" nuts.
18
Step 18
Use a 1/2" to 1/2" steel coupling to attach the motor shaft to the 1/2" rod.
19
Step 19
On the opposite end, use a 1/2" to 1/2" steel coupling to attach the motor shaft to the 1/2" rod. Make sure the 1/2" rod is going through the hole in the laser tube bottom mount (as pictured).
20
Step 20
Place a 2" bearing into the groove on the part as picture.
21
Step 21
Fasten using 2 5/16" x 2" screws, 2 5/16" washers, 2 5/16" thin (shim) washers, 4 5/16" idler bearings. and 2 5/16" nuts.
22
Step 22
Attach the rod through the bearing as shown in the picture.
23
Step 23
Attach using 2 1/4" x 1" screws and 2 cross dowels.
24
Step 24
Place the drive pulley on the rod.
25
Step 25
Place the bearing into the groove on the assembly as pictured.
26
Step 26
Fasten using 2 5/16" x 2" screws, 4 5/16" washers, 2 5/16" thin (shim) washers, 4 5/16" idler bearings. and 2 5/16" nuts.
27
Step 27
Place the mount through the rod as pictured.
28
Step 28
Attach using 2 1/4" x 1" screws and 2 cross dowels.
29
Step 29
Place the drive pulley on the rod as shown in the picture.
30
Step 30
Attach the plexi piece using 2 1/4" x 1" screws and 2 cross dowels.
31
Step 31
32
Step 32
Attach the laser mount using 1 M6 x 16mm screw.
33
Step 33
Attach the mount using an M6 x 16mm screw.
34
Step 34
Attach the mirror mount using 2 1/4" x 1" screws and 2 cross dowels.
35
Step 35
Attach the mirror mount using 2 1/4" x 1" screws and 2 cross dowels.
36
Step 36
Attach the plexi pieces as shown in the figure to form the y-axis tensioner.
37
Step 37
Attach 2 5/16" bearings and 2 shim washers.
38
Step 38
Attach a 5/16" x 2" screw and 5/16" nut.
39
Step 39
Fasten the 5/16" nut as shown in the previous figure.
40
Step 40
Secure the assembly to the mount using a 1/4" x 2" screw.
41
Step 41
Secure the power supply using 6 #8 x 1/4" screws and 6 #8 nuts.
42
Step 42
Attach the holding mount using a 1/4" x 1-1/2" screw and cross dowel.
43
Step 43
Attach the Y axis rails, using 8 #10 x 1-1/2" screws and 8 #10 nuts.
44
Step 44
Attach using 4 #8 x 1-1/2" screws, 4 #8 washers on the front (plexi), 4 1/4" washers in the back, and 4 #8 nuts.
45
Step 45
Attach using 2 1/4" x 1" screws and 2 cross dowels.
46
Step 46
Attach using 2 1/4" x 1" screws and 2 cross dowels.
47
Step 47
Secure the NEMA 24 425oz-in stepper motor with 4 #8 x 3/4" screws and 4 #8 nuts.
48
Step 48
Attach the drive pulley onto the motor shaft.
49
Step 49
Place the timing belt onto the pulley.
50
Step 50
fasten 2 #8 x 1-1/2" screws into the bracket along with 2 5/16" V-Groove bearings, 2 #6 washers, 4 #8 washers, 2 acrylic spacers and 2 #8 nuts.
51
Step 51
Fasten the plexi piece shown in the figure to the bearing assembly using a 1/4" x 1" screw and a 1/4" cross dowel.
52
Step 52
Place the acrylic spacers between the piece shown in the figure.
53
Step 53
Insert a #8 x 1" screw through the 3 pieces of plexi and secure with a #8 nut.
54
Step 54
Fasten a #8 x 1-1/2" screw with 3/16" V-Groove bearing, 2 #8 washers, 1 #6 washer, and a #8 nut.
55
Step 55
Fasten a #8 x 1-1/2" screw to the 3/16" V-Groove bearing, with 3 #8 washers, and 2 #6 washers.
56
Step 56
Fasten the .75" x 1" cable carrier bracket to the bearing assembly using a #8 nut.
57
Step 57
Install the laser nozzle head onto the bearing assembly using 2 #8 x 1/2" screws and 2 #8 nuts.
58
Step 58
Add a #8 x 1" screw with 2 #8 washers and #8 nut for timing belt tension adjustment.
59
Step 59
Picture of the timing belt attached to the hardware.
60
Step 60
Picture showing the finished laser nozzle and timing belt assembly.
61
Step 61
Attach the small cable carrier mount to male end of the 1" x .75" cable carrier. Fasten using 3 #8 x 1" screws and 3 #8 nut inserts.
62
Step 62
Attach the small cable carrier mount to the plexi with 2 1/4" x 1" screws and 2 cross dowels.
63
Step 63
Attach plexi to the large cable carrier female end using 3 #8 x 3/4" screws and 3 #8 nuts.
64
Step 64
Attach the plexi to the top bearing assembly using 2 1/4" x 1" screws and 2 cross dowels.
65
Step 65
Mount the 80 watt laser tube. Be cautious as the tube is fragile.
66
Step 66
67
Step 67
Place the laser control module into the plexi mount using 4 #6 washers and supplied nuts.
68
Step 68
Secure the Laser Control Module into the structure using 4 #8 x 1" screws and 4 #8 nut inserts.
69
Step 69
Attach the 6.0 amp driver to the inside of the left-side gantry piece using 4 #8 x 1-1/2" screws and 4 #8 nut inserts.
70
Step 70
Attach the 3.0 amp driver to the inside of the left-side gantry piece using 4 #8 x 1-1/2" screws and 4 #8 nut inserts.
71
Step 71
Attach the driver for the Laser Control Module on the inside using 4 #8 x 1" screws and 4 #8 nut inserts.
72
Step 72
Attach the power supply using 4 M4 x 25mm screw.
73
Step 73
Attach the 2nd power supply using 4 M4 x 25mm screws.
74
Step 74
Install the guide rail using 20 #10 screws and 20 #10 nuts.
75
Step 75
Install the top guide rail support using 6 1/4" x 1-1/2" screws and 6 cross dowels.
76
Step 76
Attach the angled rail mount to the gantry using 2 1/4" x 1-1/2" screws and 2 cross dowels.
77
Step 77
Attach the linear guide rail to the top rail mount using 20 #10 x 1-1/2" screws and 20 #10 x 1/4" nuts.
78
Step 78
79
Step 79
Attach the angular rail mount to the gantry using 6 1/4" x 1-1/2" screws and 6 cross dowels.
80
Step 80
Attach the aluminum rail to the gantry mount using 18 1/4" x 1-1/2" screws and 18 1/4" nuts.
81
Step 81
Attach the bottom angular rail mount using 6 1/4" x 1-1/2" screws and 6 cross dowels.
82
Step 82
Attach the bottom aluminum rails using 18 1/4" x 1-1/2" screws and 18 1/4" nuts.
83
Step 83
Attach the both top panels to the gantry ribs using 14 1/4" x 1-1/2" screws and 14 cross dowels.
84
Step 84
Attach the tabs using a 1/4" x 1-1/2" and 1 cross dowel.
85
Step 85
Attach the mount to the gantry rib using a #8 x 1-1/2" screw, #8 nut insert, and #8 washer.
86
Step 86
Repeat previous step for remaining 6 mounts.
87
Step 87
Attach the lower front panels using 14 1/4" x 1-1/2" screws and 14 cross dowels.
88
Step 88
Illustration of where to place the front top panel.
89
Step 89
Insert 14 cross dowels into the slots as shown in the figure.
90
Step 90
Attach the front top panels using 14 1/4" x 1-1/2" screws.
91
Step 91
Attach the front top panel using 7 1/4" x 1-1/2" screws and 7 cross dowels.
92
Step 92
Attach the front top panel using 7 1/4" x 1-1/2" screws and 7 cross dowels.
93
Step 93
Slide the front plexi sliding door panel onto the angular rails.
94
Step 94
Attach the window frame to the plexiglass using two #8 x 3/4" and two #8 insert nuts.
95
Step 95
Attach the window frame to the plexiglass using two #8 x 3/4" and two #8 insert nuts.
96
Step 96
Attach the wood frame piece as shown in the image using 7 #8 x 3/4" screws and 7 #8 nut inserts. Notice the white arrows pointing to the adjustment hole on the plexiglass and the groove on the wood piece. The groove on the wood piece is larger on one side than on the other side, so make sure the larger groove aligns with the adjustment hole on the plexi.
97
Step 97
98
Step 98
99
Step 99
100
Step 100
101
Step 101
102
Step 102
103
Step 103
104
Step 104
105
Step 105
106
Step 106
107
Step 107
108
Step 108
109
Step 109
110
Step 110
111
Step 111
112
Step 112
113
Step 113
114
Step 114
115
Step 115
116
Step 116
117
Step 117
118
Step 118
119
Step 119
120
Step 120
Wiring Diagram for Laser Control Unit Click here for exploded view.
121
Step 121
Laser controller parameters - default parameters
122
Step 122
Controller position relative
123
Step 123
Laser controller advanced functions
124
Step 124
laser controller user parameters
125
Step 125
laser control manufacturer parameters
126
Step 126
laser controller work parameters
127
Step 127
laser controller work space
128
Step 128
Suggested location for the X-Axis Rotary Limit switch at the zero location
129
Step 129
Y-Axis lower limit switch
130
Step 130
Y-Axis upper limit switch
131
Step 131
Y-Axis cable carrier connections
132
Step 132
X-Axis cable carrier connection on the upper part of the gantry
133
Step 133
X-Axis Cable Carrier connection on the upper part of a rib of the main structure
134
Step 134
LaserCAD System Options - Manufacturer Parameters These parameters shown are only a guide and the values that you should use for these parameters may be different. Make sure to go through the calibration on your machine to achieve the best precision and accuracy.
135
Step 135
LaserCAD - System Options - User Parameters

Questions & Answers

Have a Question?

Ask a Question
  • Do you have a more detailed diagram of the rotary and 15A limit switches on the vlxl?

    Are you trying to determine how to wire the switches or where to place them on the Vertical Laser XL? Let me know and I will provide some pictures or video on how to do this. Additional Information: Kind of both. Have somewhat of an idea as to how to wire them but you included rotary and other limit switches. Not sure which ones to put where. Never worked with these before.

  • Can your 4' x 8' vertical laser/engraver be built with a 4th axis for engraving cylinders (baseball bats)?

    Absolutely, between the ribs that make up the structure, there is room to add other peripherals like an 4th axis.

  • My machine gantry weighs about 250lbs, I am going to be using 2 steppers to move it. I am using 2510 ball screw and the steppers will be direct drive, will a pair of 651oz steppers be enough? I will be mostly working with aluminum so my feed rates will be low I just want to make sure I dont loose steps due to not having enough power.

    Since you are using a ball screw which has a very low coefficient of friction to move your heavy gantry, you will have no problem at all using the 651 oz-in motors, and you are not going against gravity, so if you use screw jack formulas that use the low of the machine, you will not need to use weight which is (mass x gravity 9.8 m/s/s). Instead, it will be more susceptible to the inertia of the gantry and if you have any problems, you can compensate by lowering the acceleration. Additional Information: Excellent, thank you for your help. Additional Information: How do I go about ordering the redleaf system you have discussed? IS there any lead time? Thanks again

  • How many poles and pairs does your 2.5 KW spindle have?

    Our spindles are 2 pole, however we do not understand the "and pairs" portion of your question? Additional Information: Additional Information: Additional Information:

  • How do I wire the limit switches on the VLXL? Also, where do I place them? You included 2 rotary and two other limit switches.

    You can actually select many places for the switches, depending on where you think your zero will be. I will take pictures of where we positioned our switches. We set the positions so the zero is at the bottom left corner of the machine. Additional Information: I will take pictures tomorrow. Additional Information: Thank you. Just want to finish before the holiday. Additional Information: Not a problem at all and my apologies for not having that information. I have been meaning to put up a video on the limit switch connection as it is somewhat difficult to explain the process in words and diagrams. Additional Information: Any update? Additional Information: I plan on driving to the office later today and take pictures. Additional Information: Thank you. I've just done almost everything else. Just waiting for the grade 3 grease in the mail. Also, where do you suggest connecting the cable carriers? I ran everything through the top but the carrier is getting kind of full. Because of that, it is pushing the belt out when the gantry moves. Additional Information: I will take pictures of those connections as well. Additional Information: Much appreciated. Additional Information: It�s my pleasure. Additional Information: I�m almost to the office. I�ve been shuttling my kids around today. Sorry for the wait. Additional Information: I�m adding the images to the end of the VLXL instructions. Additional Information: The limit switch connections use the NO (Normally Open) terminals. That means that the switch, when not engaged, is normally open (no connection between the com and the NO terminal). When the switch is engaged, then the connection is closed and the NO and COM terminal become connected, making a circuit. Additional Information: Did you bend the arm on the x switch? Or can you mount it flush with enough give to trigger? Same on both sides? Additional Information: It does look like it is bent in the picture. No, you do not need to bend the arm of the rotary switch. Additional Information: We only have the rotary switch on one side.

  • Hi im interested in your new 4 x 8' laser , what is the thickest mdf sheet it can cut through ?

    We have not specifically tested for this data point, but a general rule of thumb is that an 80W CO2 laser can cut wood up to about 1/2 inch. Actual results depend on a number of variables -- power level used, amount of air assist, focal length of lens, number of passes, cutting speed -- and each of those has its own tradeoffs. We are planning to do some of these tests in the near future and post the results, so stay tuned for more in depth information.

  • Hi I want to build a cnc laser table 13'x15' cuttting area. Is this feasible. Also would the 80watt laser be enough power to cut through carpet

    Yes, it is feasible to create a machine with a cutting area of 13'x15'. Your mechanical and structural systems will need to be able to span a bit more than the 13' if that will be the axis travel along the gantry. We have not cut carpet with our lasers, but I don't see why not. With that said, be extremely careful with the materials in the rug. Read the MSDS (Material Safety Data Sheet) for the rug you intend to cut as some materials will emit corrosive and harmful gases and chemicals when lased.

  • Hello, I want to put together an XL verticle laser/cnc router. Need to do it on a limited budget. Can get many of the components and can mill most of the structure. Do you offer plans for such a project?

    Yes, we are currently redesigning the entire machine and we will offer plans for the Vertical Laser XL machine as well.

  • Hello! How fast could I get a VLXL? Looking to get it by the end of the month. In WV. Ben

    If you purchase the Vertical Laser XL in kit form, then we would be able to deliver it within 2 weeks. If you want the Vertical Laser XL to be assembled, we would need a minimum of 1 month. Additional Information: What is the shipping cost to rural WV? Mannington, WV.

  • greenBull Assembly Instructions The following videos are missing: https://www.buildyourcnc.com/greenBullCNCMachineKit.aspx

    The greenBull videos are back up. The videos were blank since we added security to the website and those videos were coming from an unsecured http version of YouTube rather than their https.

  • Good day to you! We haven't communicated in quite some time! I am still wanting to pursue a 4 x 8 CNC spindle and 80kw laser system! Please respond so we can put this together!

    We already have a system that meets those needs: https://buildyourcnc.com/images/machineConfigurations/greenBullV2_size_04x08_angle_flat_f1_no4thaxis_f2_wilasergantry_f3_nolaser_f4_wilaserready_.png You can find that machine on the home page. It's the first machine on the page and all you need to do i click on the "Add A Laser" button at the top left of the image.

  • dont own one. interested in blackfoot. (really looking for 4x4) . is the electronics all straight foward hookup like the videos? the table top & all electronics comes with the kit? does the usb board replace the paralllel?

    The blackFoot CNC machine kit does not include a table. The table can be made as long or shot as you need. for instance, if you are looking for a travel of 4 fet x 4 feet, then the table will need to be about 6 feet long to get the full 4 feet of travel. The electronics are very straight forward using the connection diagram for the breakout board that you select. Use the videos for a general idea and then use the connection diagram to verify the correct connections for the interface of your choosing. Yes,the USB interface replaces the breakout board, but remember that you will need to use the planet-cnc software with the USB interface. Additional Information: The electronics does accompany the cnc machine kits as long as you select the option "with electronics". There are option to purchase the machines without electronics and that would be necessary if you either have your own electronics, or you prefer the plug and play cnc computer system we call the redLeaf, or redSprout. This will also be necessary if you prefer the electronics that use the USB interface rather than the parallel interface. Additional Information:

  • Does the VLXL kit come with absolutely everything you need to start up?

    The Vertical Laser XL Laser Cutter comes with everything but the hookup wires and heat shrink for wiring and the tools you will need to assemble the machine and wire the electronics. You will also need a blower/vacuum to evacuate gasses in the cavity of the machine, and a compressor to provide air assist at the nozzle. 4 conductor motor cable is supplied. Water and air tubing is supplied along with the structure, hardware, mechanical parts, electronics, and chiller. The wiring will require strippers for insulation removal at the tips and a soldering iron to solder motor wires to them motor cable. Screw drivers and hex wrenches will be needed. Assembling this kit is not for the faint of hearts and a ton of patience is necessary. It is a very entailed process that will take a bit of time to complete. If you have any reservations at all, please consider the assembled version.

  • Does the VLXL feature an air jet for clearing carbon from the cut?

    The VLXL does not come standard with a 1600 CFM air blower, but we do have them available.

  • Does the vlxl come with software?

    You will need to download free software called LaserCad. Here is a video that covers the installation: https://www.buildyourcnc.com/tutorials/tutorial-trocen-anywells-lasercad-install

  • Bought a vlxl from you guys. Great design however since you changed the main gantry support from plastic to wood, the guides for the head do not fit with the given plastic pieces. I do not think I have enough wiggle room in the plastic to drill new holes. I may be able to cut down the aluminum. What do you suggest?

    Are you referring to the parts that make up the mount for the nozzle that slides along rail? Additional Information: Yes. Because the wood is thicker than the plastic, the holes for the screws that hold the bearings are off. Additional Information: Yes, understood. We must have used the wrong CAM file to cut the parts for those pieces. My apologies for that. I would rather send you new pieces poste haste. Additional Information: I might just go ahead and try to make them. I already had to make one piece that was missing. However, if you think you can get them here by Thursday, I can just go ahead and put the body together. If you do plan on sending them, I also need three more M 8 x 16 mm screws. Also still looking for a mini air compressor for the assist. Overall, the design is great and I'm enjoying putting it together. Additional Information: Thank you for the kind words. I will send it anyway and check with Sandra (the current shipper) if Thursday is possible. Just to confirm, the parts related to the steps 46 to 52 in the Vertical Laser XL instructions. Correct? There is a single screw that tightens the bearings onto the rails. This screw is located at the center of the assembly. I'm sure you did this already, but it deserves a mention just in case somebody else has this issue. Make sure that the screw is all the way loose to see if it still doesn't fit. Also worth mentioning, make sure not to tighten it too much as it is very easy to crack the plexiglass. The screw creates a very high force on this assembly. Additional Information: Yes. I think you should revisit your plexi cut sheets. The top two holes that hold the laser head from step 47 we're not drilled. I had to drill those. The part from step 48 was not included so I modified a different piece to make it. Also, the centerpiece from step 32, was not included. I ended up making one from plexi but I suggest machining it from aluminum. Additional Information: That is odd. I will definitely take a look. That doesn't sound right at all. Additional Information: But, once again, great design so far. I much prefer putting it together myself. Ill start working on the body. Additional Information: Hello, I was able to adjust and get the head on track. Additional Information: Hello, I was able to adjust and get the head on track. Additional Information: Excellent! Additional Information: I ended up just using a 2 nut system to secure the tensioner. The one I made cracked so that's why I suggested a machined Al. Additional Information: That makes sense. Additional Information: Hi Patrick, I also seem to have gotten some old or mis-cut parts -- holes don't line up in step 31, slot missing in step 36, and so on. I sent you an email last Friday with more details (subject "Order 41101"). Since then we realized that the y axis rails for step 37 are also cut too long and will need to be cut down by a few inches. That's as far as we've gotten so far, so no idea what else is lurking. Additional Information: I've copied my last comment to a new question to keep from cluttering up this thread; don't know yet if I'm also going to hit the issues with steps 46-52.

  • can I purchase the 2' x 4' laser with an 80 watt tube?

    We offer a 4'x8' laser system that uses an 80 watt laser tube. Vertical Laser XL 4'x8' Our blackTooth 24"x20" laser uses a 40 watt laser tube due to the internal size constraints and that the laser tube is mounted on the gantry for ease of aligning and maintaining better power at the cutting end. blackTooth 24"x20" Laser

  • Any Black Friday deals coming up or other deals? Thinking about purchasing a VLXL.

    Yes, for the 2017 Black Friday, we will have a sale coming up. The sale will include all assembled machines at a 5% discount. Additional Information: So only assembled machines? Awe man. I would really like a discount on the Blacktooth Laser... Additional Information: You are preaching to the choir. We are the type of company eager to help makers out there, but our kits just don't have the profit margin to cover a discount.

  • AM NOT SURE HOW TO SET THE Z AXIS TURN ON/OFF LASER WHEN CREATE CODE. KNOW THAT ITS TYPICALLY Z-AXIS MOVEMENT DOES THIS - BUT YOU DONT SHOW ANYTHING HOOKED UP IN PLACE OF AXIS.

    When the z axis is going down, the laser turns on. When the z axis is going up, it turns off. The z axis directions is only a signal that is either 5v or 0v. That determines the direction. In vectric, you will need to set your machining operations with a very very small depth so the time it takes to get to its final depth is a very short time.

  • am interested in purchasing the 80 Watt Vertical Laser XL 4'x8' Laser Cutter and Engraver, what material depth can it cut?

    The Vertical Laser XL's 80 watt CO2 laser tube is capable of cutting lighter material such as wood and plastic at up to 1/2" or 12mm.

  • I have a double engrave in y_swing mode in my vertical laser machine

    When engraving with the vertical laser, use unilateral movement for the y-swing. Unilateral engraving will allow the firing on the laser in one direction.

  • Can I just purchase a laser head to replace my router when all I choose to do is print or copy a photo

    Sure. You will need the proper mount for the laser tube and a mount for the power supply in relatively close proximity to the laser tube. If you have one of our greenBull CNC machines, you can use the laser/spindle head that we offer.

  • Does the laser XL have air assist?

    Yes, the vertical laser xl comes with a small air compressor that it typically used for air brush.

  • How does your piece stay In place - so I cut a circle out - does it fall out?

    The workpiece (the item being cut or engraved by the laser) in the laser is not perfectly vertical. There is an angle to the bed, and a ledge at the bottom that the workpiece will set against, so the workpiece will stay in place. Depending on the size, weight, and rigidity of the workpiece, you may need to adhere the workpiece to the bed using various methods. For example, if the workpiece is a piece of leather, you will need to adhere the workpiece to the bed, or to another item that can be placed into the machine. More rigid items can simply be placed into the laser and the operation of cutting and engraving can start without adhering the workpiece to the bed of the machine. Since lasers (as opposed to a CNC with a spindle that creates a physical cutting action) there is no force on the workpiece. Only the lasing light will be hitting the workpiece. The kerf of the cut from a laser is small enough that parts cut out of the workpiece will stay in place. If you feel that there are pieces that may fall out of the machine while cutting, you can use various methods of adhering those sections to the bed of the machine.

  • Can this machine use a bigger laser tube than 80W?

    Yes, the vertical laser XL (VLXL) can use a laser tube with a higher wattage than 80 watts. The maximum wattage depends on the length of the laser tube. As the wattage of the laser tube increases, the length of the laser tube also increases. The inside clearance of the Vertical Laser XL will allow a 130-watt CO2 laser tube to be used.