


BuildYourCNC
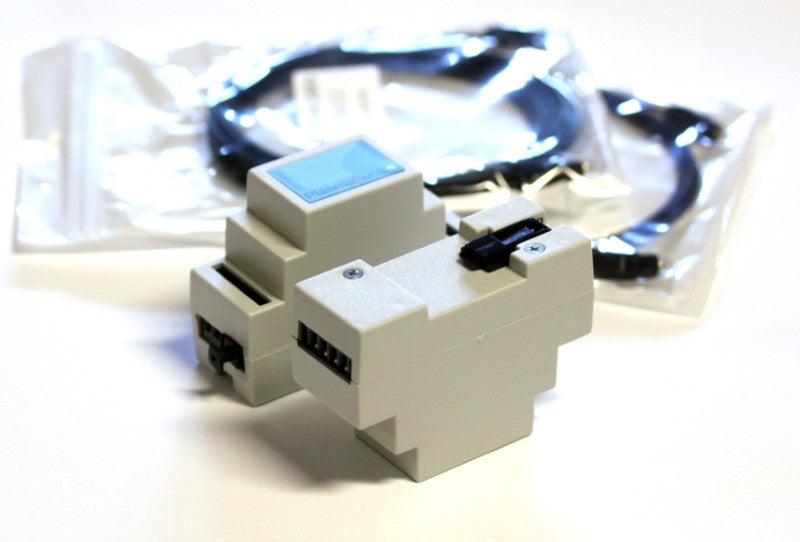
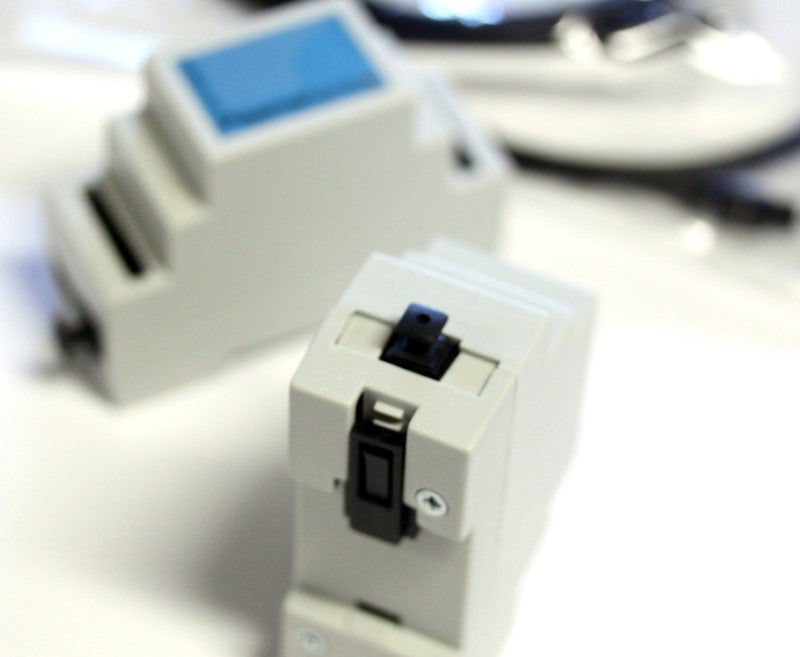
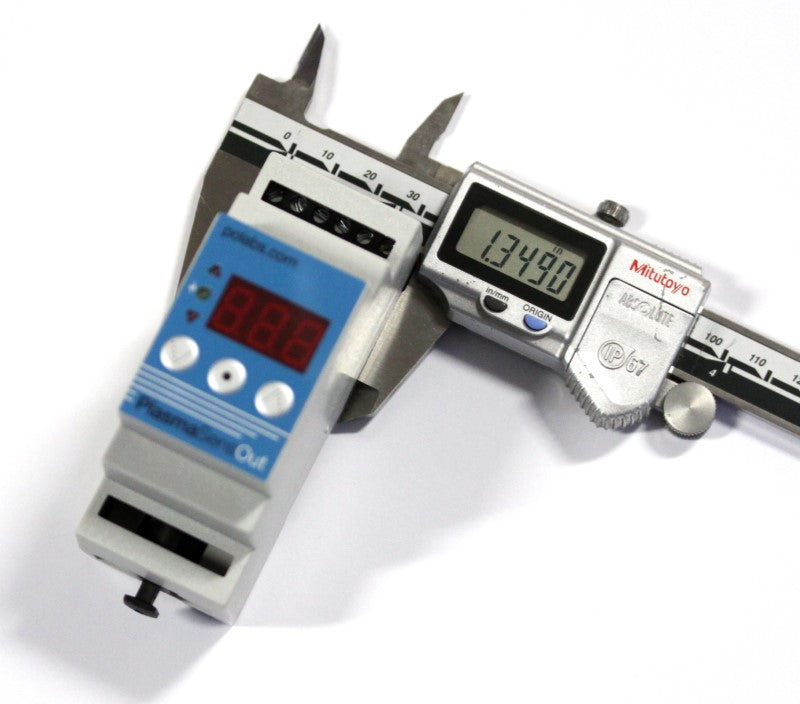
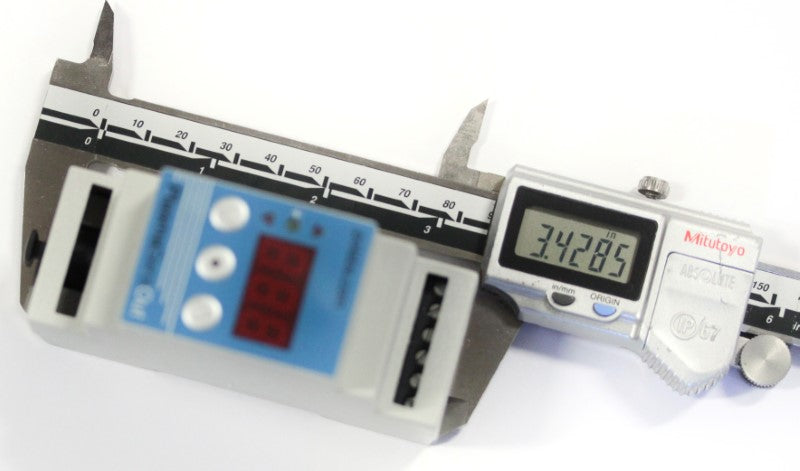
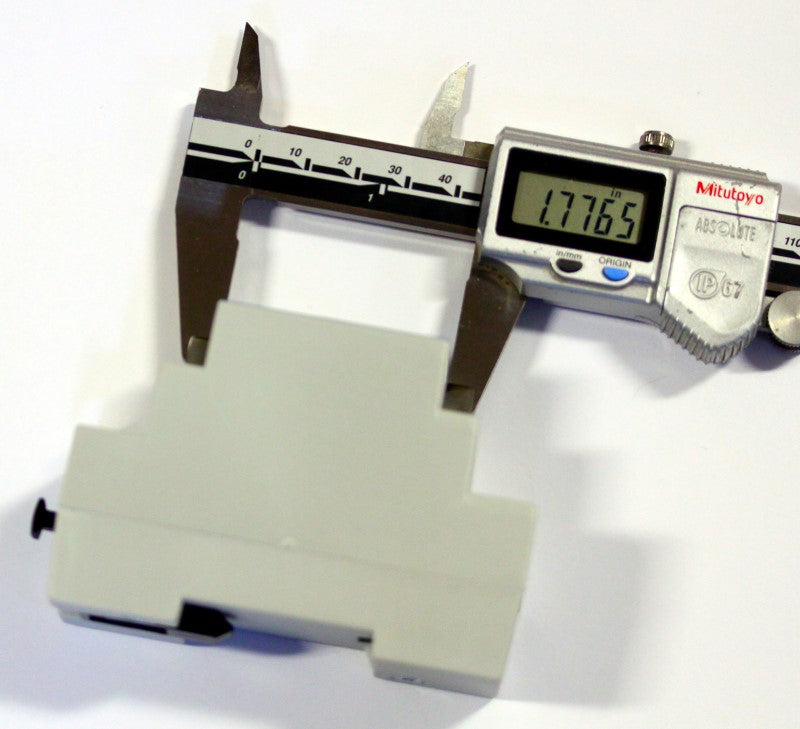
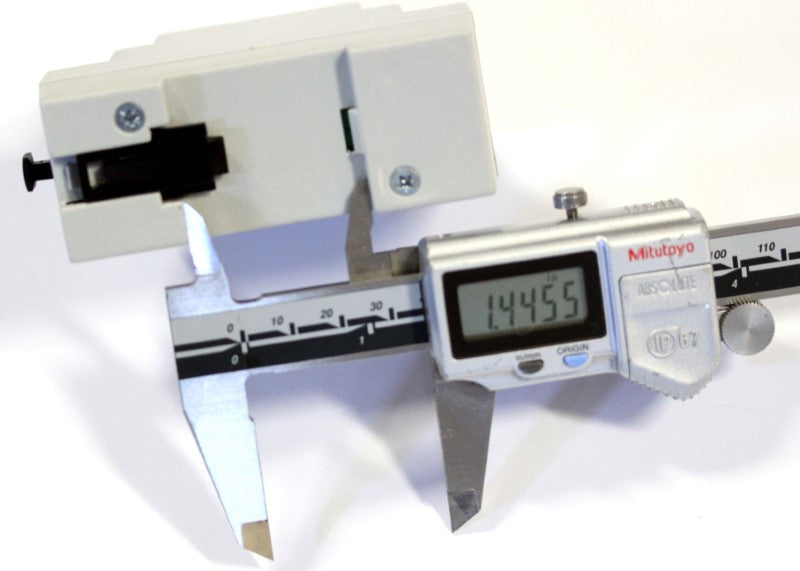
Plasma Controller and Sensor THC (Torch Height Controller)
Plasma Controller and Sensor THC (Torch Height Controller)
Couldn't load pickup availability
Share


Questions & Answers
Have a Question?
-
DO WE CAN BUILD OUR CNC MACHINE WITH TOW TORCHES (PLASMA TORCH & OXY ACETYLENE TORCH)?
As you know, the plasma nozzle must be close to the cutting area and you will need some way to keep the nozzle at the right level with some type of device. The spray is downward, so you will need a contained area with a sheet of water at the bottom to extinguish he spray. You should have no problem using our machines for this application since you would need to product the table bed.
-
CAN YOUR PRODUCTS OF MACHINES BE USED TO CREATE PLASMA TABLE?
The plasma nozzle must be close to the cutting area and you will need some way to keep the nozzle at the right level with some type of device. The spray is downward, so you will need a contained area with a sheet of water at the bottom to extinguish he spray. You should have no problem using our machines for this application since you would need to product the table bed.
-
Hello! i want to change my existent faulty plasma control to a match control, can you suggest something for this?
In regards to your current electronics, one of our electronics combo will work perfect in your application. Depending on size of your machine, 1 out of 3 of our combos will work!(modification may be needed and may vary) However, if you are currently thinking about salvaging some items, it might complicate the swap. These are the things that may complicate the swap: First: If your current plasma is running off of servos, none of our controllers will work in your application, hence you will need to replace all your electronics. Second: If you have stepper motors, our interface boards will work with your motors! Only thing is to get it to work hand in hand with your current drivers! Third: If stepper motors are what you have! You might only need a few items to get your machine back up and running Fourth: Our current parallel interface board, will work with Mach 3! Which has a plasma control software implemented with it. Please email customerservice@buildyourcnc.com for further assistance!
-
Hello , Do you have an option to use our FedEx account on overnight service to ship our order to B.C. Canada ?
Yes, We can overnight packages to Canada using a customer's FedEx account number.
-
my plasma cutter has a 50 to 1 divided voltage what can i do to wire that to the thc? let me know thanks.
The PlasmaSense THC has two terminals for high-voltage inputs + and - at a max of 350V and alternative terminals for +10 and -10 volts max intended for the divided voltage from the plasma cutter. If the divided voltage does not exceed 10V + or -, then you can use this THC. If the divided voltage is more than 10V, you will need to further reduce that divided voltage.
-
Can this THC with another controller than the one mentionned ?
This torch height controller can be used with any controller that allows three inputs to be assigned within Mach3. The pokeys57CNC is such a controller. The Mach3 USB controller cannot be used with a THC, but another controller that can accept inputs can be used. The three inputs are used to inform Mach3 of ARC up, ARC ok, and ARC down.